Intro
ExceedIntegrate is a web based solution for integrating external sources of data into your physical security platform. It allows you to use external, existing sources of truth (such as Calendars) to change the behavior of your security devices.
Getting Started
What you'll need
- An ExceedIntegrate customer account with an active subscription or trial
- A supported physical security platform
- At least one supported calendar source
Add a calendar source
As an example, we are going to add a USA Holidays calendar from an internet source.
Navigate to the Calendars section of the ExceedIntegrate interface, and click the New Calendar button.
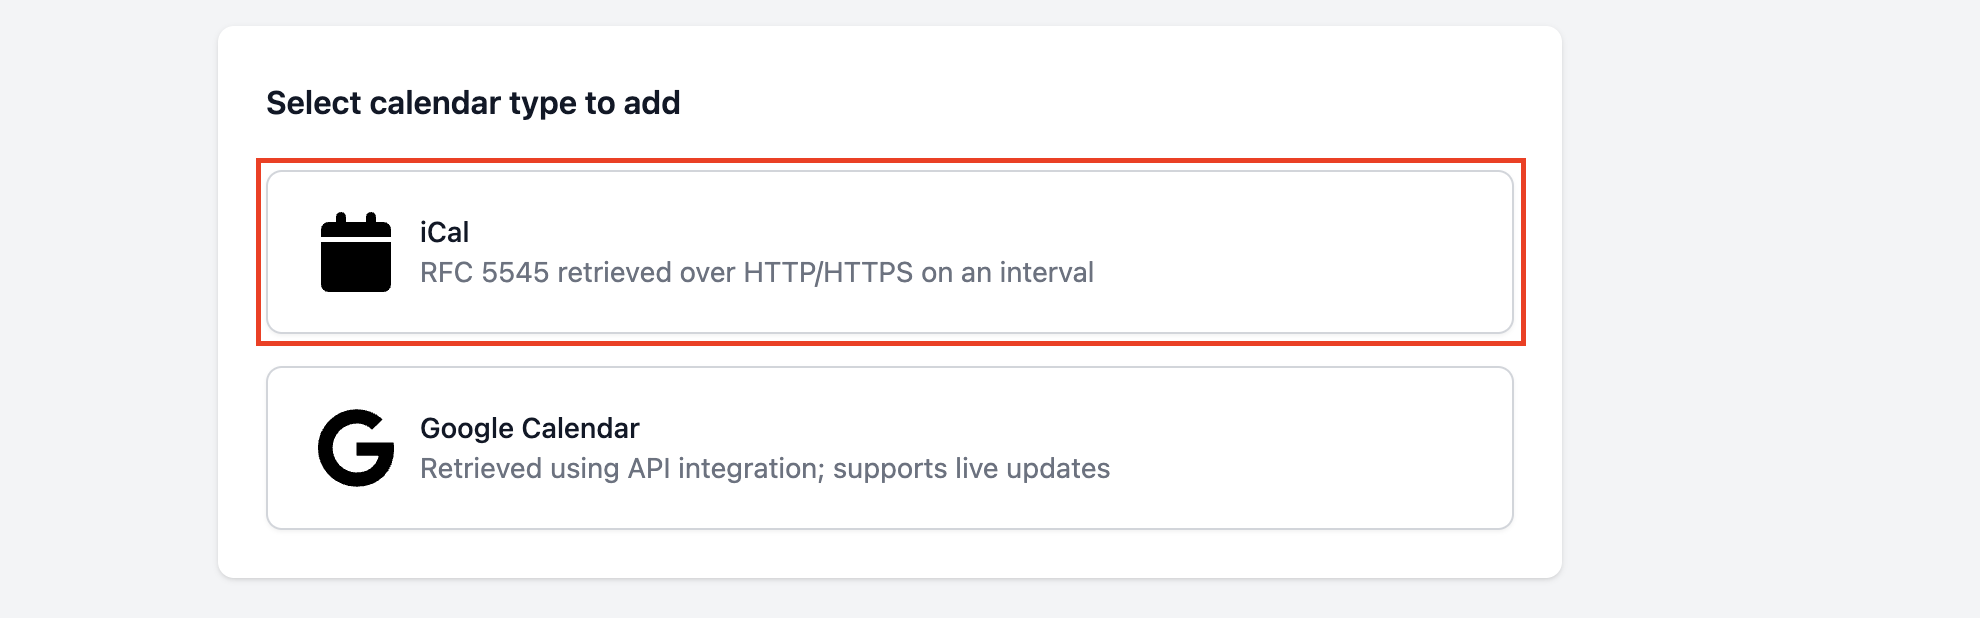
Select the type of calendar source from the available choices presented. For this example, select iCal.
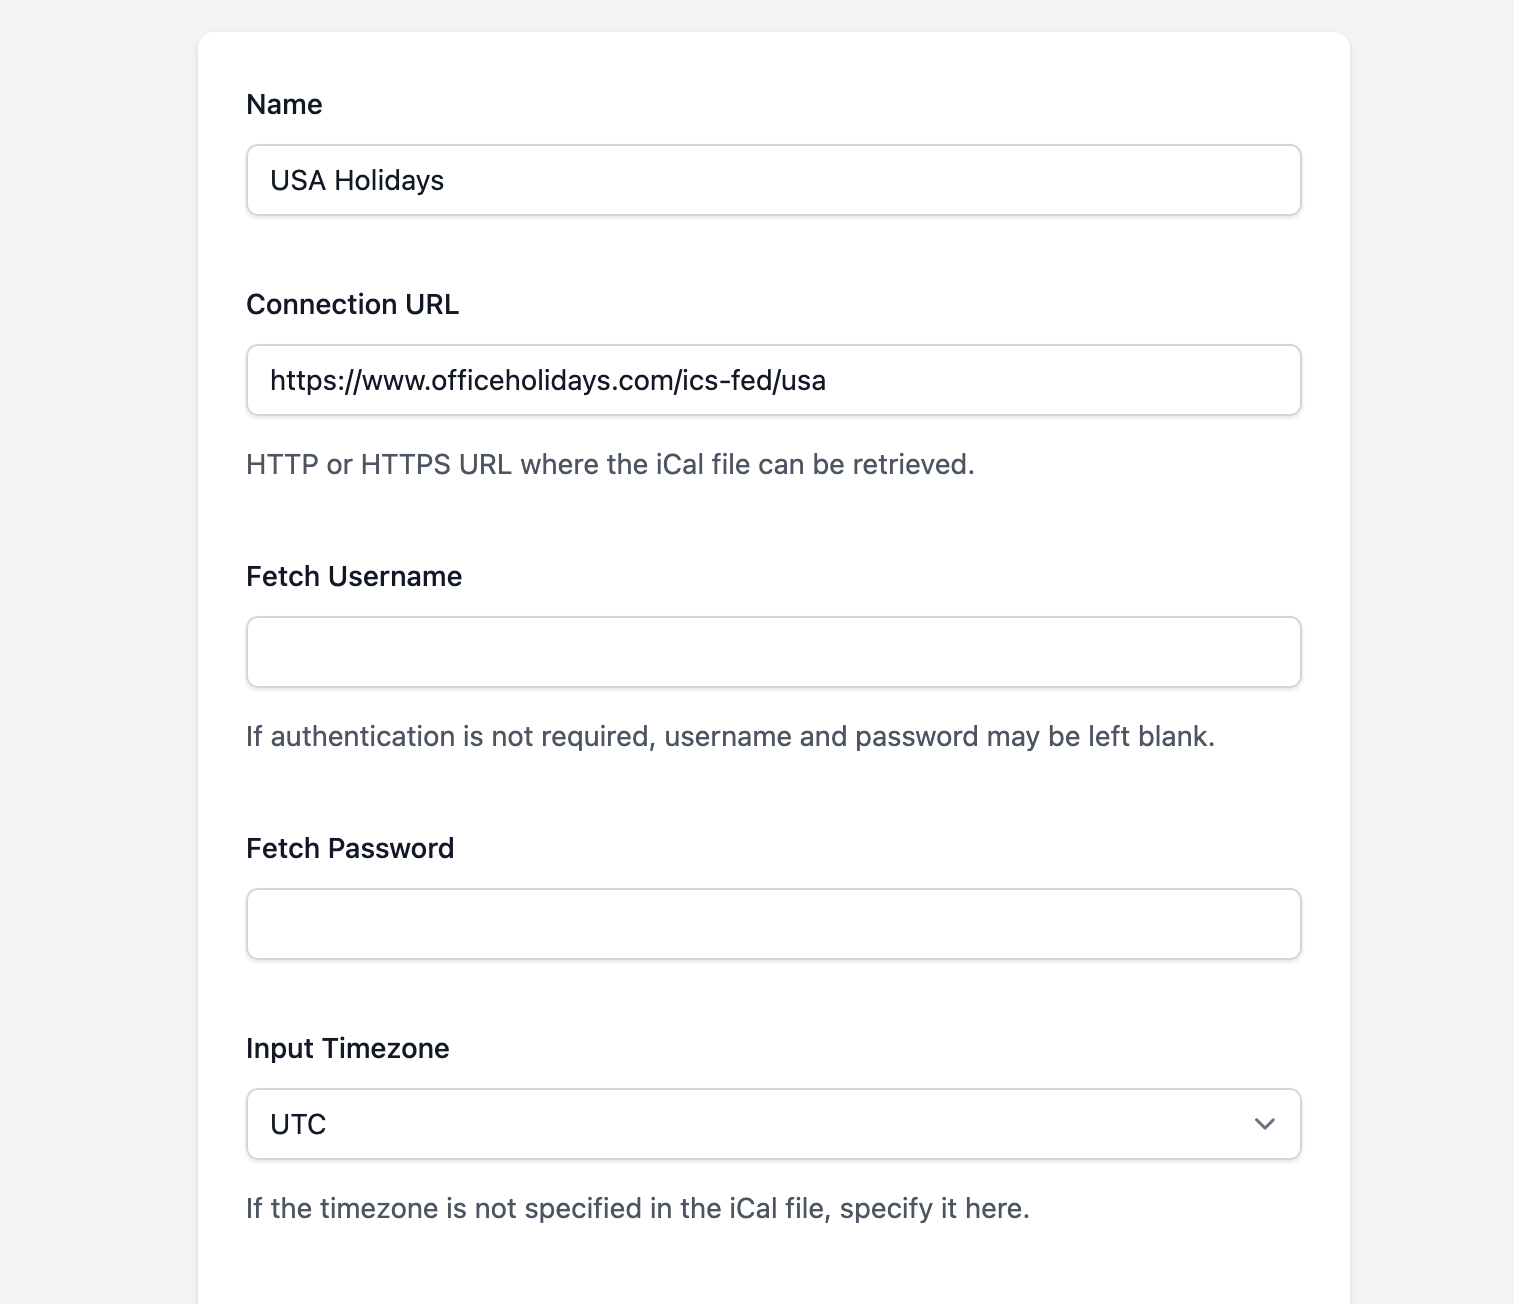
On the details page, enter a name for the new calendar such as USA Holidays.
Next, enter the below URL in the Connection URL box.
https://www.officeholidays.com/ics-fed/usa
The above URL and company is not affiliated with Exceed Technologies and is merely used as a documentation example.
This source does not require authentication and is displayed in the UTC timezone, so no other options are required.
Click Add.
After a few seconds, refresh the Calendars screen, and you should see Success listed next to the calendar entry. This means we were able to download the iCal file from the source and import the events. This calendar will now be fetched automatically in the background on a recurring schedule to get updated events.
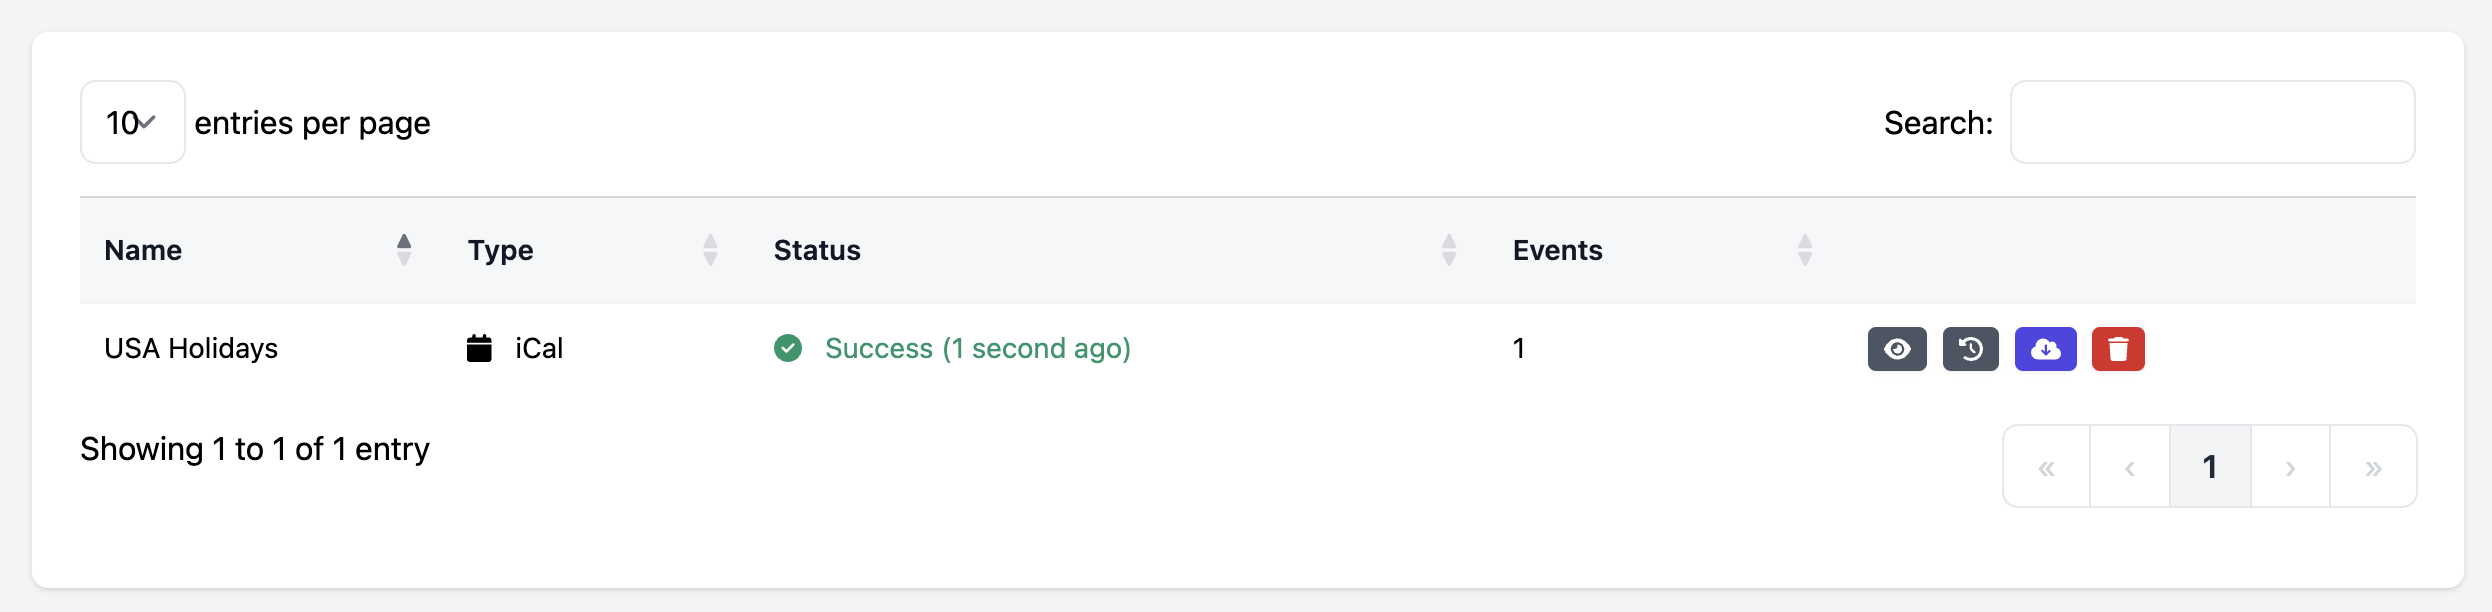
You can click the eye symbol button to view the events that we downloaded from the iCal source.
Add a system
Next, we need to connect our security platform that we want to push data to.
Navigate to the Systems section of ExceedIntegrate. Click the New System button to create a new system.
Enter a new name for the new system, and select the system type from the available list.

Once back at the main system list, click the eye symbol to view the integration instructions.

This page will vary depending on your security platform choice, but it will contain basic instructions to how to link your security platform with ExceedIntegrate. See the Systems section of the documentation for more detailed instructions for your platform.
Once the integration process is completed, the status of the system entry will change from Unlinked to Connected, showing it is ready for use.

Add a schedule
Finally, we need to create an output schedule which will contain the events we want to pass back to our security platform.
Navigate to the Schedules section of ExceedIntegrate. Click the New Schedule button to create a new schedule.
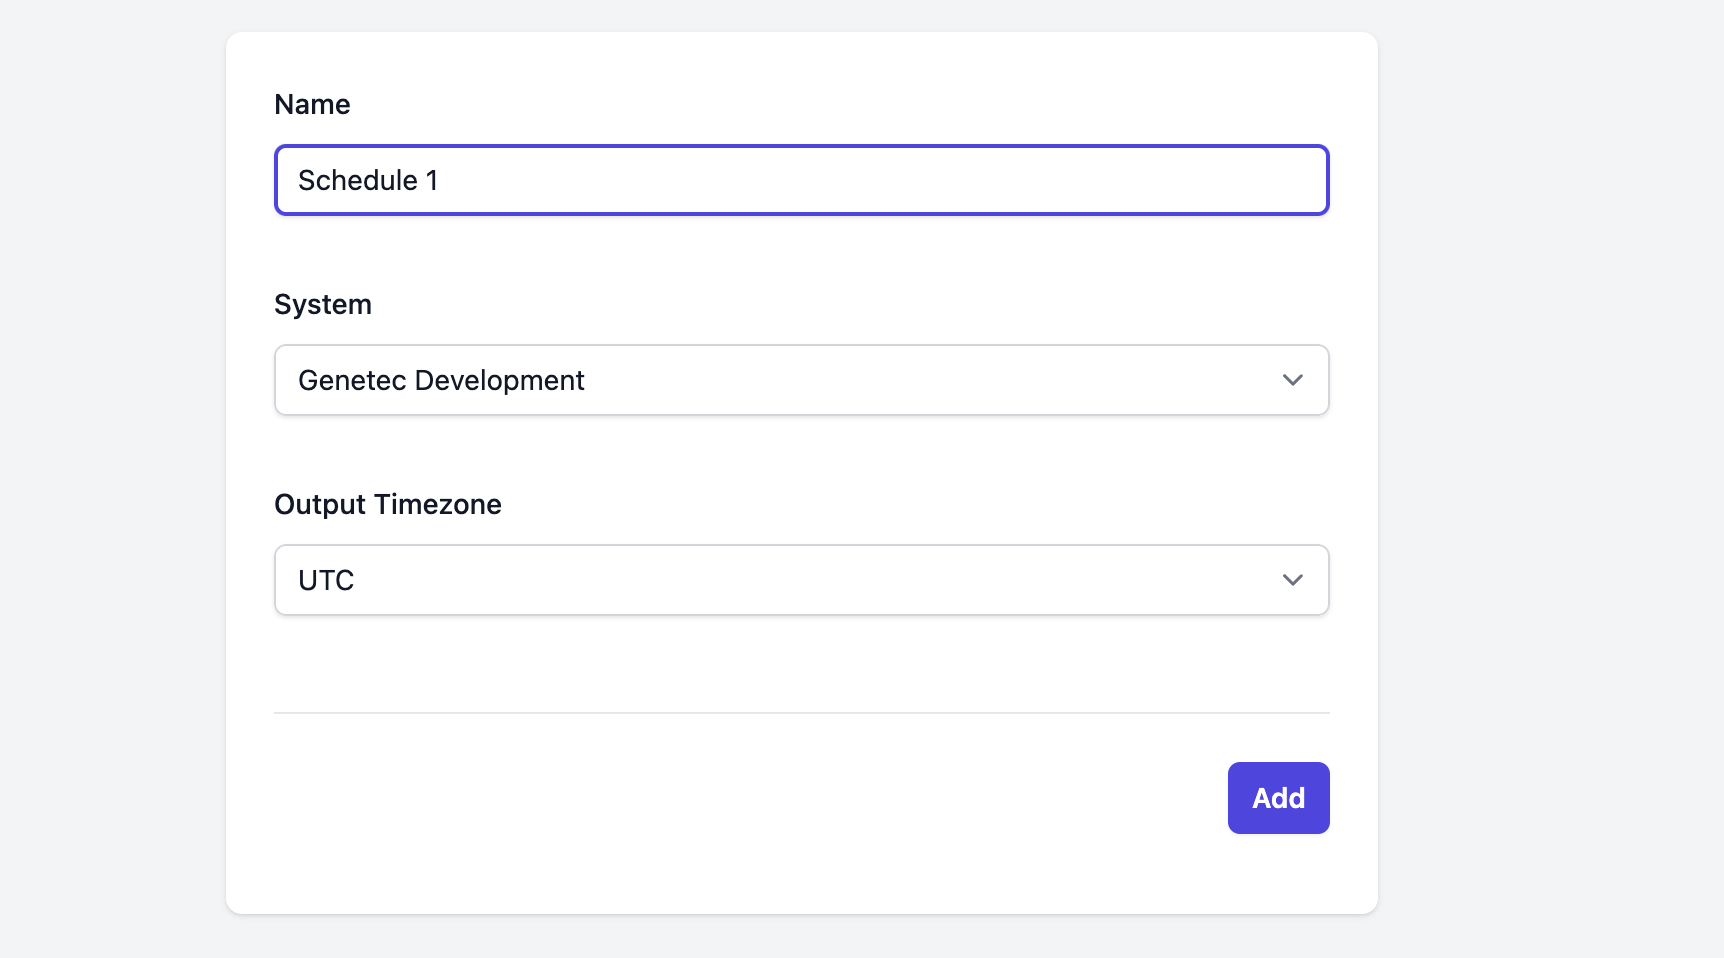
Give your schedule a new name and make sure the system you created in the last step is selected. You can also select the timezone that events should be exported in. This should usually be set to your local timezone.
Now, on the schedule list screen, click the yellow pencil icon next to the schedule. This will take us to the schedule rule editor. Then click the New Rule button to create our first rule.
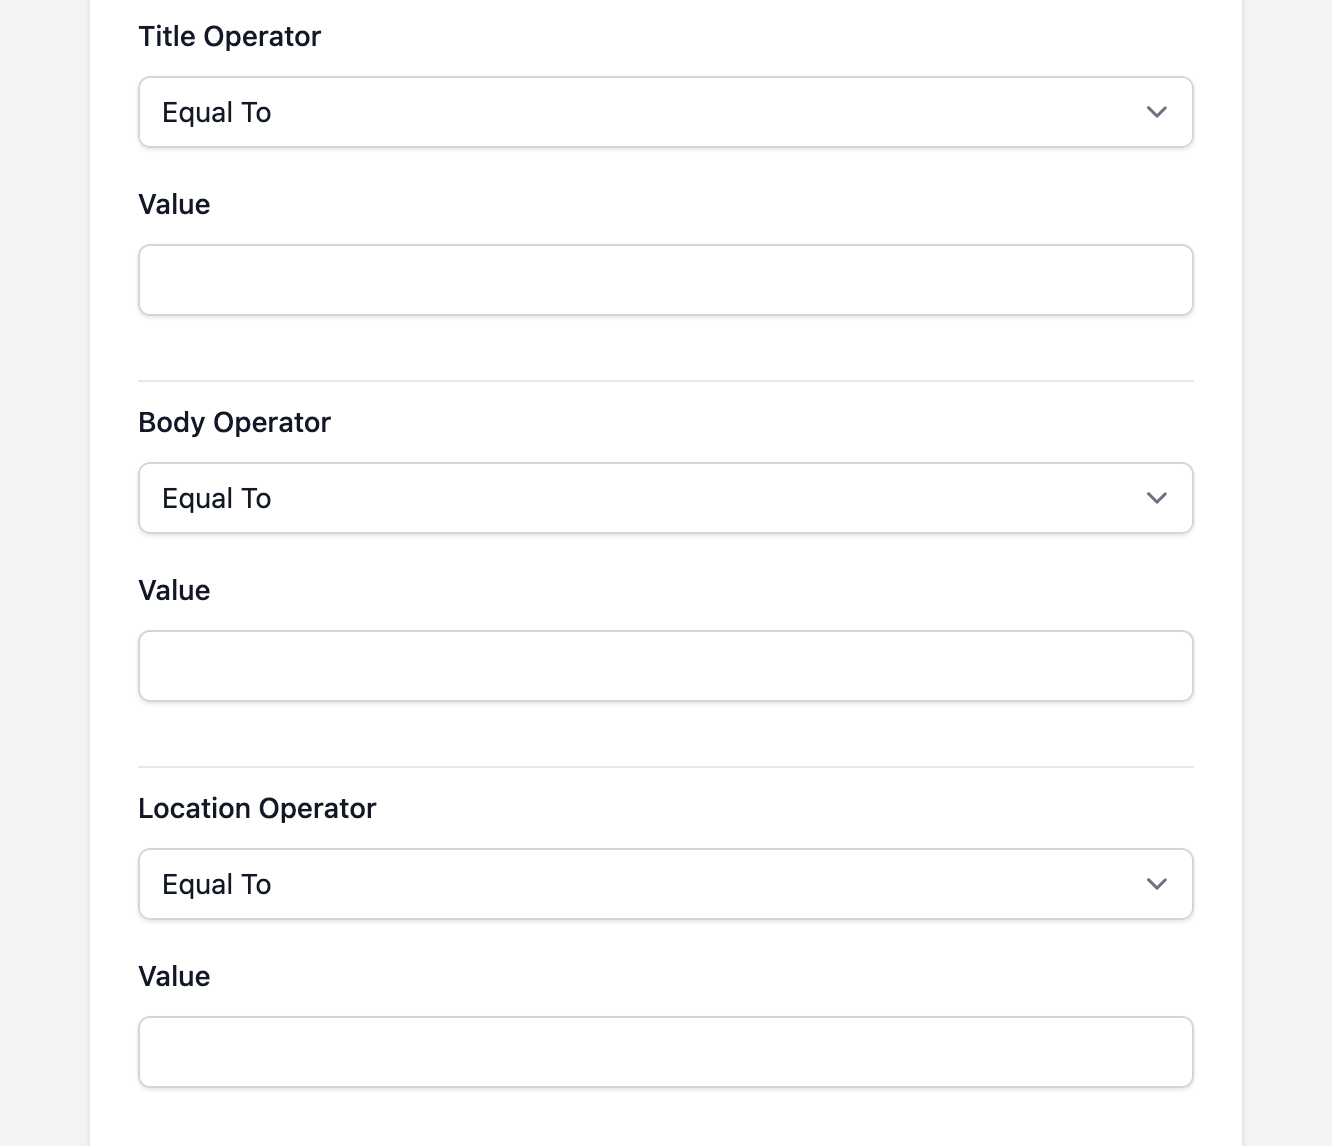
Schedule rules allow the filtering of events from the source before they get created in the destination. This also allows you to combine events from multiple source calendars into a single schedule in your security platform.
All operators in a schedule rule are optional. If no operator values are specified, all events from the source calendar will be exported on the schedule. If multiple operator values are specified, they function as AND statements - meaning ALL of the conditions must be true for an event to be included.
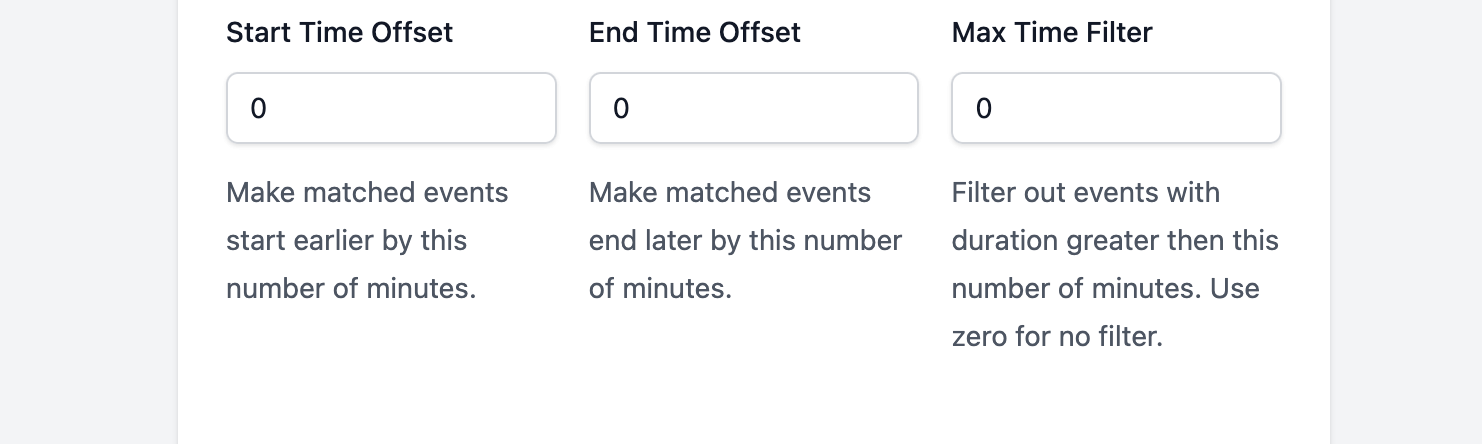
There are also two time modifiers and a maximum time filter at the bottom of the add rule page. These allow you to modify the event start and end times before export to the security platform. The max time field allows you to set a maximum duration for events matching the rule. If a matched event is longer then the duration specified, it will be excluded from the schedule.
For our simple example, select the calendar source we created earlier and do not specify any operator values or time filters.
Once you click Add, you will take back to the schedule rule list and can see a text description of what our rule will match.

Click the Schedules menu at the top of the screen to return to the schedule list. The status icon next to the schedule name will check to a green checkmark symbol once the events are downloaded to the security platform.
You can also click the eye symbol to view a preview of the matching events that will be downloaded to the security platform.
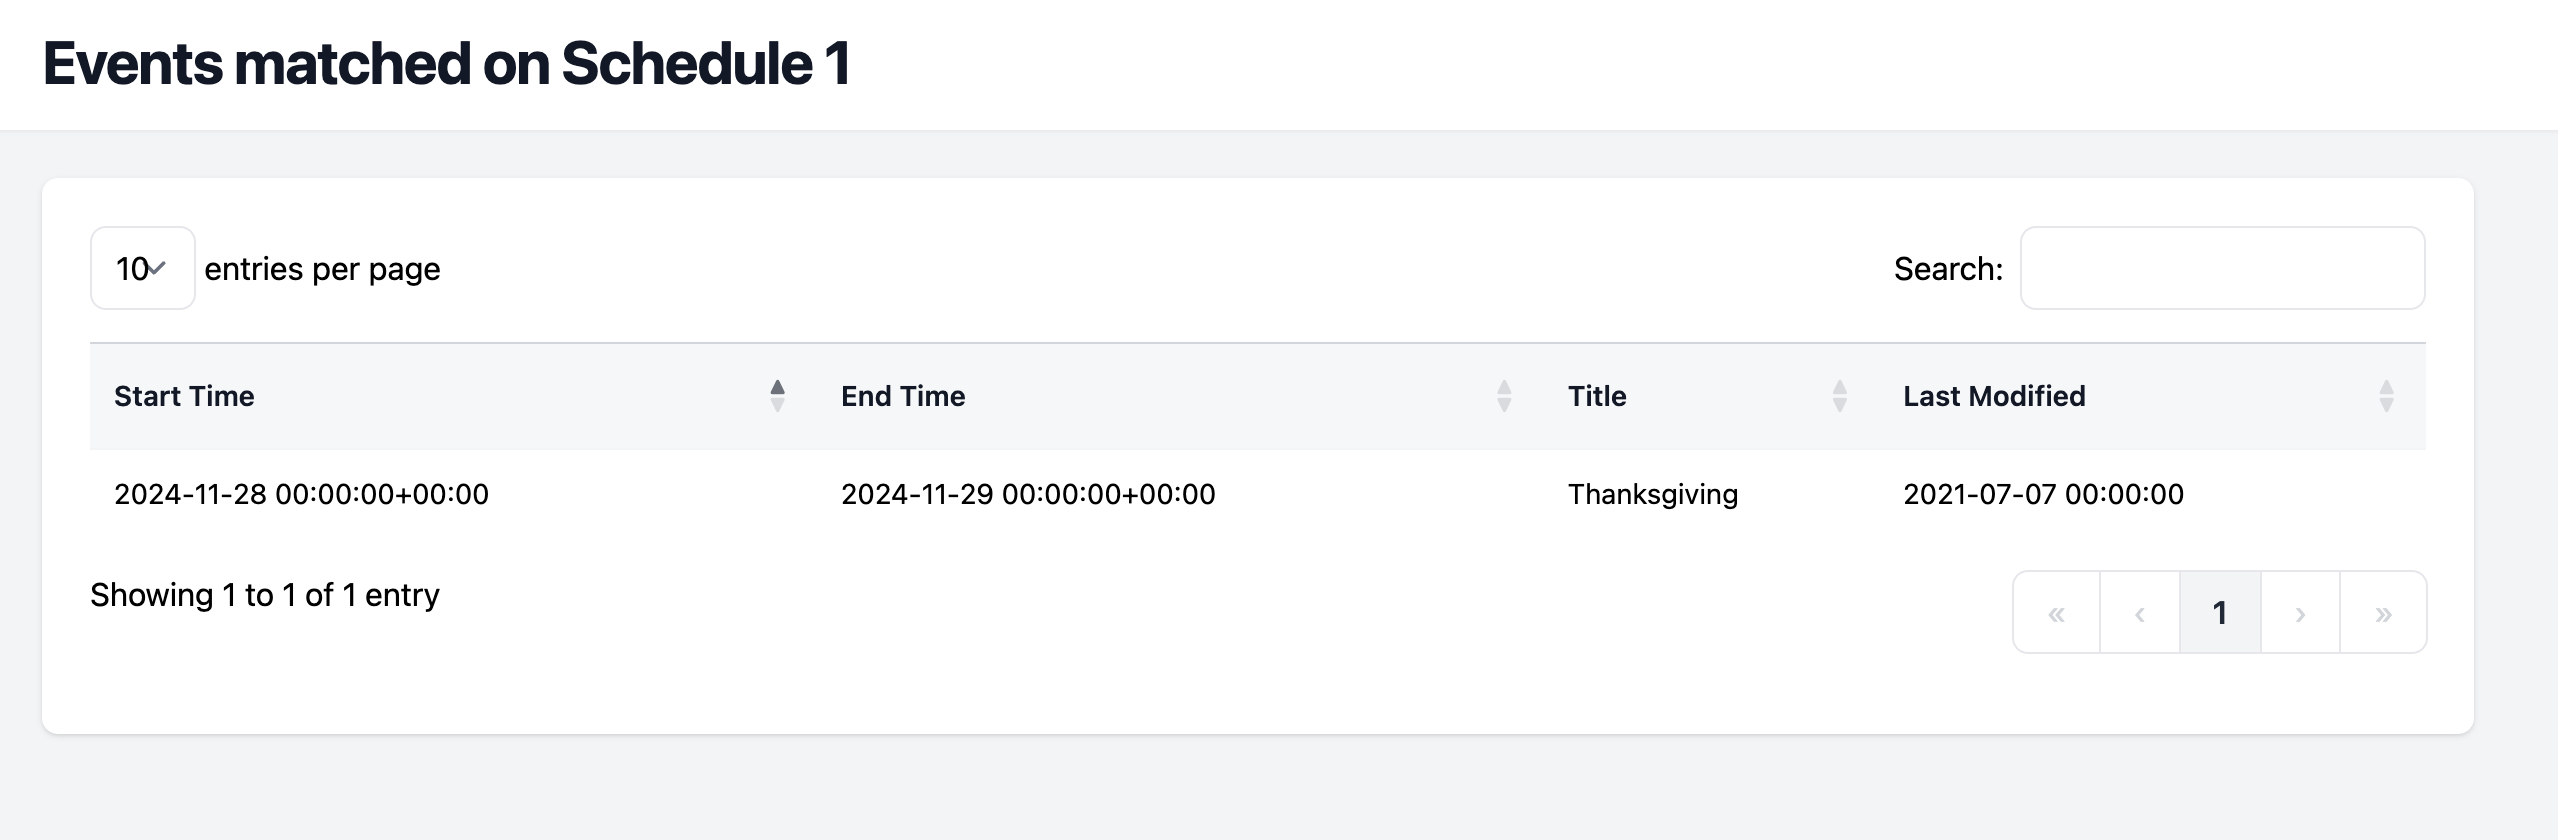
The events should now be available in your security platform's scheduling menu. Any chances in the source calendar or the schedule rules will automatically make changes in your security platform.